Ahoy there Hipster Homers! I’m
Julie and I’m the very first guest blogger on this fine site. Today’s project involves breaking stuff, plants, found objects, and miniatures. Fun, right?

Let’s get started! We’re going to go through the steps to create your very own little terrarium. I like building terrariums inside of lightbulbs because of the inherent challenge of working in such a small space as well as how the simple, industrial beauty of a light bulb complements the intricacy of natural elements. (I was inspired to try this out after seeing
this post on Apartment Therapy a couple of months ago.)
We’ll get into the nitty gritty of how to make one of these. But first, let’s go through some key dos and don’ts of light bulb terrariums. I assembled these tips and warnings through extensive trial and error as well as helpful advice from the folks at
Flora Grubb Gardens and
Hortica in San Francisco.
Dos and Don’ts DO:
- Do use sand or small pebbles; these are good because water drains through them easily. (Wet soil will get moldy in a confined area. You don’t want this.)
- Do use Tillandsia, also known as air plants; these are a great choice for your tiny terrarium because they take all the nutrients they need from the air and a small amount of water. No roots means no wet soil which means no mold. You can buy tillandsia at garden stores or online.
- Do choose preserved moss instead of live moss. Preserved moss isn’t living, but it will hold moisture; this moisture raises the humidity level in the terrarium, which makes the tillandsia happy. You can find sheet moss, reindeer moss, and other preserved mosses at garden and floral stores.
- Do keep your terrarium in partial sunlight.
- Do give your terrarium some water. The tillandsia is alive and will need a small amount of water to stay that way. Water it by either removing it and soaking it in water once a week or, using a spray bottle, give it a small spritz of water every week or two. Pour out any excess water.
- Do feel free to use little rocks, pieces of glass, or any other bits of things to help give your terrarium character.
DON’T:
- Don’t use soil. Again, you don’t want a soupy, moldy terrarium. That would be gross.
- Don’t use live moss. Moss is really picky and isn’t likely to survive well in this environment.
- Don’t keep your terrarium in the dark.
- Don’t keep your terrarium in full sunlight, either.
How To: You’ll need a few tools to make a tiny terrarium but nothing complicated to get started.
- Needle-nose pliers
- Scissors
- Long tweezers or chopsticks
- Flathead screwdriver
- Glasses or goggles

Let’s start with the light bulb. I like the globe kind that are used to light bathroom vanities. You can buy them at any hardware store, or preferably, use one that’s burned out to save resources. For those of us in northern California, one option for buying burned out bulbs (if you don’t have any on hand) is the
East Bay Depot for Creative Reuse in Oakland. Don’t use “soft white” bulbs or else your terrarium will just look like January in Minnesota. I don’t think this is what you’re going for.

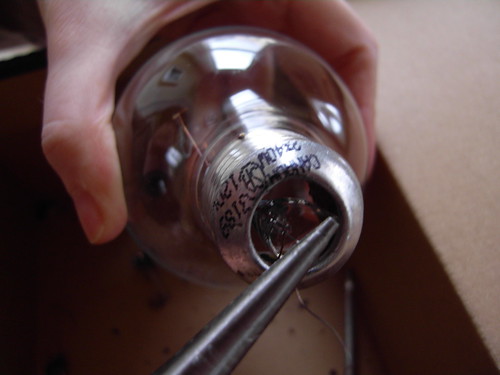
We will be removing the inside parts of the lightbulb. This step involves breaking glass, so wear glasses or goggles to protect your eyes. I recommend doing this over a box to contain any flying pieces of broken glass. And, obviously, this is an “adults only” kind of task.

First, remove the metal tip from the bottom of the bulb. Using needle-nose pliers, carefully nudge the sides of the metal tip from the black glass part.

Then, when enough of the sides are raised to get a good grip on them, hold one of the sides with your pliers and yank out the metal tip. You will feel a couple little wires snap when you do this.

Next remove the black glass. Hold one side of the glass with the pliers and firmly twist up to snap the glass. Repeat around the other sides and pull out any remaining bits of black glass. This glass is pretty thick and will take some force to break it; so be careful and hold onto the bulb firmly.

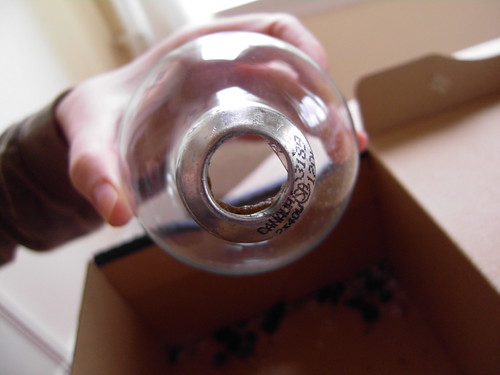
Now you will be able to see the interior parts of the light bulb.

Using the flathead screwdriver as a sort of lever, snap the interior tube from the side. It will make a totally satisfying little sound as the
argon escapes. Then twist the screwdriver around to smash the containing tube. It takes some force to do this; be careful, but also don’t be afraid of the bulb itself breaking. It probably won’t. Hold tight to the bulb while you do this.
Pull out any remaining wires with the pliers.
If there are any last bits of glass around the interior edge, break these off with the screwdriver.

And now you have an empty light bulb! That is definitely the hardest part of the endeavor. Next, put adhesive silicone bumpers on the side of the bulb to keep it steady.
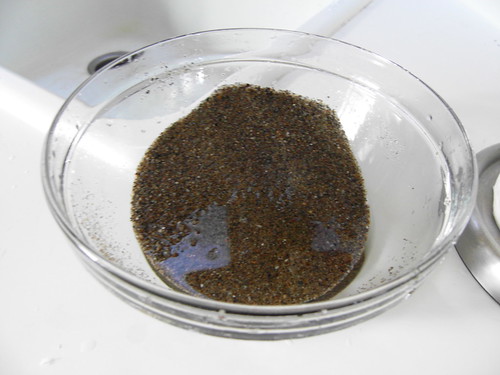
We’ll use sand as a substrate for the terrarium. You can buy it at a garden store or collect it from a beach. If you use beach sand you will need to thoroughly rinse it to remove any salt.
The sand in this tutorial is from the beach, so our first step is to rinse it.
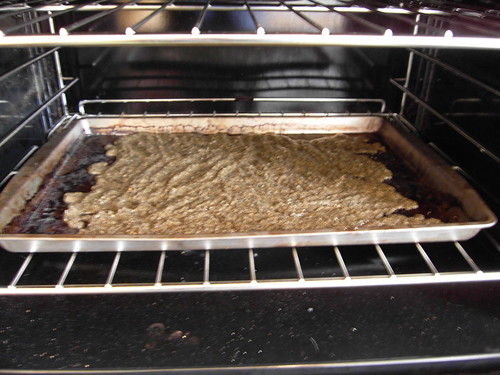
To dry it, either spread it in a thin layer on a cookie sheet and leave it sitting for a few days, or dry it in the oven at 300 degrees. Be careful taking it out, because it will, hopefully obviously, be pretty hot.

The sand should be completely dry before continuing.

Once it’s dry, put a couple tablespoons of sand into the lightbulb. Make this easier by either using a funnel or a folded piece of cardboard.

This terrarium includes preserved sheet moss, reindeer moss, and tillandsia.

Cut off a small bit of sheet moss and put in the bulb. Position it using a chopstick or long tweezers. Tear off a few small pieces of reindeer moss and add this, as well.

Put a tillandsia in the bulb, pushing the smaller end in first. Position the different elements to look nice together and add more moss or rocks if you’d like. It might take some poking to get everything in the right place; be patient and experiment with different arrangements.

For extra fun, tiny toy animals can enliven your terrarium. I used a miniature horse for this one, and stuck a piece of gold wire in its head to make it into a makeshift unicorn. Any other found objects, like rocks, sticks, marbles, etc., would also be fun.